Setting Up A Web-Server with Node.js
This is only a test article
A Brief Overview of Node.js and Web Servers
A web server is software and hardware that responds to client requests sent over the World Wide Web using the HTTP (Hypertext Transfer Protocol) and other protocols. A web server's primary responsibility is to show website content by storing, processing, and sending webpages to users on request. While web server software manages how a user accesses hosted files, web server hardware connects to the internet and enables data(web server software and other website-related assets like HTML texts, pictures, and JavaScript files.) to interchange with other connected devices. The client/server concept is demonstrated via the web server operation. Web server software is a must for all computers that host websites.
How Web Servers Work
There are a number of steps that happen when a browser like Chrome and Firefox asks a web server for a page. An individual will first enter a URL in the address bar of a web browser. The web browser will then translate the URL through the DNS (Domain Name System) or by looking in its cache to find the IP address of the domain name. This will bring the browser to a web server. The appropriate file will then be requested by the browser via an HTTP request to the web server. In response, the web server will transmit the browser the requested page through HTTP once more. The web server will respond with an error message if the requested page does not exist or if something goes wrong. The webpage will then be seen in the browser.
An Overview of Node.js
One general misconception of Node.js is that it's a programming tool. Node.js is a tool that helps javascript runs on servers, a cross-platform runtime environment for building highly scalable server-side applications using JavaScript.
Node.js is an open-source server-side runtime environment built on Chrome's V8 JavaScript engine.
Node.js provides capabilities to create your own web server which will handle HTTP requests asynchronously.
Setting Up the Development Environment
To build our robust web server we would require the following tools.
Node.js and NPM (Node Package Manager),
to install Node on our system you can visit Node.org.
Choosing an IDE or text editor:
For our web server, I will be using VSCode but feel free to use any code editor of your choice.
Creating a Basic Server
Setting up the web-server instance
To create a server instance we would firstly create a file named server.js , copy and paste the code below.
var http = require('http'); // 1 - Import Node.js core module

var server = http.createServer(function (req, res) {   // 2 - creating server

    //handle incomming requests here..

});

server.listen(5000); //3 - listen for any incoming requests

console.log('Node.js web server at port 3000 is running..')
We import the built-in http module using require() function, the http module is a core module of Node.js which provides functions and objects for creating an HTTP server.
Next, we create an instance of the server using http.createServer() method of http and specify callback function with the request and response parameters. Finally, call listen() a method of the server object which was returned from the createServer() method with the port number, to start listening to incoming requests on the desired port number (in this case, 3000). A callback function is executed once the server is running, which logs a message to the console. To run our server we node server.js on our VScode terminal.
You can access the server by opening a web browser and visiting http://localhost:5000 .
Handling HTTP requests and responses
The http.createServer() method includes request(req) and response(res) parameters which is supplied by Node.js. The request object can be used to get information about the current HTTP request e.g., url, request header, and data. The response object can be used to send a response for a current HTTP request.
The following example demonstrates handling HTTP request and response in Node.js.
var http = require('http'); // Import Node.js core module

var server = http.createServer(function (req, res) {   //create web server
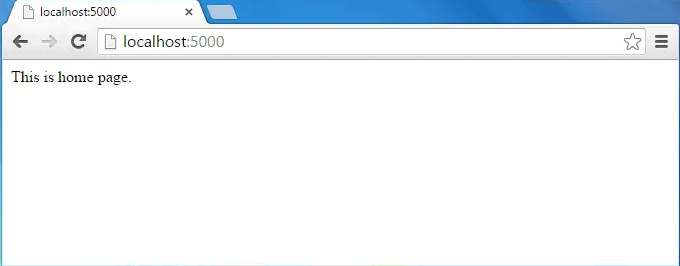
    if (req.url == '/') { //check the URL of the current request

        // set response header
        res.writeHead(200, { 'Content-Type': 'text/html' });

        // set response content
        res.write('<html><body><p>This is home Page.</p></body></html>');
        res.end();

    }
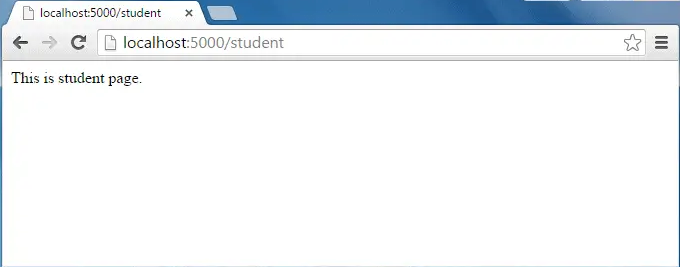
    else if (req.url == "/student") {

        res.writeHead(200, { 'Content-Type': 'text/html' });
        res.write('<html><body><p>This is student page.</p></body></html>');
        res.end();

    }
    else if (req.url == "/admin") {

        res.writeHead(200, { 'Content-Type': 'text/html' });
        res.write('<html><body><p>This is admin Page.</p></body></html>');
        res.end();

    }
    else
        res.end('Invalid Request!');

});

server.listen(5000); //6 - listen for any incoming requests

console.log('Node.js web server at port 3000 is running..')
We import the
httpmodule, which provides the necessary functions and objects for creating an HTTP server.We create an instance of the server using
http.createServer(). The server's callback function is executed whenever a request is received.Inside the callback function, we set the response headers using
res.writeHead()this is achieved using the write() method. In this example, we set theContent-Typeheader totext/plain.We handle different routes/endpoints using
ifandelse ifstatements. In this case, we handle the root endpoint'/'and the/aboutendpoint.For each endpoint, we set the appropriate status code
res.writeHead(200),and send the response content usingres.end(). The server responds with plain text content in this example.For unknown routes, we set the status code to
404indicate that the requested page was not found.Finally, we start the server by calling
server.listen()and providing the desired port number. A callback function is executed once the server is running, which logs a message to the console.
When you run this Node.js server, it will listen on the specified port (in this case, 5000). It will handle incoming HTTP requests, determine the appropriate response based on the requested route, and send the response back to the client.
Sending a JSON Response
In a Node.js web server, sending JSON responses to clients is a common practice for building APIs or delivering structured data. By utilizing the response object and appropriate headers, we can send JSON data to clients from our server.
var http = require('http');

var server = http.createServer(function(req, res){
    console.log('request was made: ' + req.url);
   if (req.url == '/data') {
        res.writeHead(200, {'Content-Type':'application/json'});
    // application/json type because we are sending a json file to the client
        var myObj = {
            name: 'kalio',
            job: 'software engineer',

    };
    res.end(JSON.stringify(myObj))
}
    // .end expectes a string or a buffer and not just any response
})
We import the
httpmodule to create the server and handle HTTP requests and responses.Inside the server's callback function, we set the response header
Content-Typetoapplication/jsonusingres.setHeader(). This informs the client that the response will be in JSON format.We create a JavaScript object
myObjrepresenting the data we want to send to the client. In this example, it contains a 'name', 'job' and 'age' property.We convert the
myObjto a JSON string usingJSON.stringify(). This converts the JavaScript object into a JSON-formatted string.Finally, we send the JSON response to the client using
res.end()and passing themyObjstring as the response body.
When a client sends a request to this Node.js server, it will respond with a JSON object containing a message and a timestamp. The client will receive the JSON data and can parse it accordingly.
Definition of Related Terms
Buffers: a buffer refers to a temporary storage area in memory used to hold incoming or outgoing data. It acts as a middleman between the client and the server, allowing for efficient and controlled data transfer. When a web server receives data from a client, such as an HTTP request, it is often read in chunks and stored in a buffer before being processed. This buffering mechanism allows the server to handle large amounts of data more efficiently
Streams: A stream is an abstract interface that allows the server to read or write data in a continuous and sequential manner, without needing to load the entire data into memory at once.
Client: A device or software program that makes HTTP requests to a server in order to access web resources or services is referred to as a client. Clients interact with web servers to retrieve web pages, submit forms, consume APIs, and perform various actions on the server.
Clients initiate communication with a web server by sending HTTP requests. These requests include methods (e.g., GET, POST, PUT, DELETE) to indicate the type of action to be performed on the server, along with the requested URL and any necessary headers or data.
Protocols: protocols refer to standardized rules and formats that define how communication occurs between clients and servers over a network. Protocols provide a set of guidelines for establishing a connection, exchanging data, and handling various aspects of the communication process.
Hypertext Transfer Protocol (HTTP): HTTP is the foundation of communication on the World Wide Web. It defines how clients and servers exchange web resources such as HTML pages, images, and other content. HTTP operates on top of TCP/IP and utilizes methods like GET, POST, PUT, and DELETE to perform different actions on web resources.
WebSocket: WebSocket is a protocol that enables full-duplex communication between a client and a server over a single TCP connection. It provides a persistent connection that allows real-time, bidirectional data transfer, making it suitable for applications requiring continuous communication, such as chat applications or real-time dashboards.
File Transfer Protocol (FTP): FTP is a protocol used for transferring files between a client and a server. It allows clients to upload, download, delete, and manage files on a remote server. FTP operates on separate control and data connections for issuing commands and transferring data.
Conclusion
This is only a test article as said above